My First Car Shoot

 Recognize this beauty???

Not enough information to identify this sweet little car?  How about this?

Still not enough?  Then how about this...


No?  Well, that's the best shot I have, so I guess I'll just have to tell you.  It's the 2005 Ford GT.  A race/sports car with a rich history.  And she's my pride and joy.  Well, not next to my BMW Z4 cause, you see... um....  I don't fit in the Ford.

Purchased at Walmart for $5, I've been having some fun with tabletop photography.  Thought I'd share the results, and some behind the scenes info on how I did it.

The 1st 2 shots were made with this setup:


I wanted to play with constant light sources (a fancy way of saying "I'm using light bulbs") for a change. Unlike flash units, they let you see where the light is going before you take a shot. I also wanted to play with a single light source, so I started with a 12" square DIY (Do It Yourself) soft box with a 20W CFL bulb in a rigged up housing.

The soft box is suspended over a black mirror (sheet of glass painted black the bottom side), which provides that awesome reflection.

To get the first shot I shifted the soft box till the edge facing the camera was just over the car. I then taped on a piece of black foam card so that only about 2" of the front section of the soft box was providing light.  For the 2nd shot I removed the card, shifted things so the car was centered under the light, then added white paper "tents" to bring in details on the front edge and tail.  You've got to watch where you place the tents, however. Bring them too far forward (toward the camera) and they'll reflect light onto the side of the car, ruining the effect.

For the last shot things got a bit more complex.  My goal was to recreate the look and feel of a full-sized car shoot while sticking to the single light source theme:


Ok, ok, as you've not doubt noticed there ARE 2 lights up top, but that's only cause I didn't have a single light bulb with enough power to do the job.  So, I arranged them so they lit the nylon rip-stop fabric evenly across it's entire length, creating one single light source.  Wouldn't you agree???   (ahem)

Ok, so - I stretched white nylon rip-stop fabric across a PVC pipe frame I'd built some time ago, then strategically placed black foam cards on top to create interesting light/shadow patterns on the surface of the car.  The most important effect to accomplish is the reflection in the windshield.  Placing the black cards to light the top of the card took only a couple minutes.

The sticky part comes when trying to redirect the overhead light source onto the sides and front of the car. This is where tabletop photography gets fun - I cut custom sized pieces of stiff chrome paper, folded them into tents and placed them around the car to get the lighting effects I wanted.  This worked great for everything but the grill and tail.

For the tail, I added a large tent of white A4 paper for a larger, softer look.  The front grill was the problem - I couldn't get enough light from the fabric above to light the grill properly.  Easily solved though - there's a lot of spare light around to play with.

Those Home Depot reflectors don't point all the light down into the fabric.  Some light leaks out to the sides above the fabric/frame combination.  I placed a 12" square mirror tile in a clamp (just visible on the left side of the setup pic) and aimed it to pick up this stray light and send it toward the car.  In the right side of the setup shot, the mirror tent behind the right-front corner of the car bounces this light back onto the grill and corner.  A nice side effect of the large mirror is that it also brought up the light on the wheels and the white stripe running down the side.

So, who needs fancy, expensive gear to create a great car shot???  Grant you, things would have been a bit more dicey if the car was life-sized....

OH - before I forget: that little black dot on top of the fabric?  It's placed there to block most of the light from hitting the "Ford" emblem on the nose of the car.  There was too much glare bouncing into the camera  that you can't read it without the little dot.

(grin!) Hope you enjoyed.

Oh Snap! A little more smoke

Played around with an art piece a friend loaned me, working light and shadow, and the challenge of mixing props with smoke. I kept stalling cause I wasn't sure how I was going to make it work, but once I got started it was quite fun.

Here's what I came up with:

You are my tree and I will protect you!
When I saw this tree at my friend's house I knew I wanted to play with shooting it.  When I saw the bear on sale at Hobby Lobby I knew just exactly HOW I was going to shoot the tree.

The above shot is not it...  Not entirely....

Ah MAN!!!  That was my LAST ONE!!!!
THIS is what I had in mind from the moment I saw the bear...   (click on the image to see it larger)

And this is how I did it:


Speedlight @ 1/4 power camera left and behind the tree and bear. Gelled orange and fired through a 1/4" Honl grid. Speedlight gelled red @1/2 power fired through one of those bathroom glass bricks to create a pattern on the black background.  It's propped up on a roll of blue tape to help with positioning.  Speedlight camera right @1/64th power with 1/2 cut CTO fired through a Lumiquest SBIII soft box.  I ended up adding 2 sheets of velum to drop the light level on the tree so I could could balance it with the bear.

Table top is a 1/2" piece of MDF with solid black low-gloss formica. It's propped on rolls of duct tape to keep the tree's base out of the frame. It also allows the incense to be placed right next to the tree without showing up in the bottom of the frame.

Hope you enjoyed...

Oh Snap! Tabletop Photography

It's cold in Colorado. I like it (please ignore my sister snickering in the corner there in Az.), but am spending less time outdoors as a result. So, turned my attention to some photography I'd wanted to do for some time. Product, or tabletop photography.

My first attempt - I got hold of a small-scale model of the Tron bike (the new movie version) and played with it on a black mirror.

What's a black mirror? It's a pane of glass from a 24x36 framed picture I bought from Goodwill for $5. Tossed the cheap metal frame, stowed the artwork (in case I need a backdrop) and cleaned up the glass. Paint one side with black paint and you've got yourself a black mirror.

Here's what I came up with:

First, a little black-on-black actio
Lower the camera and hit the background with some blue light
Back up high (the angle I think of when I think Tron bike) and add smear to the mirror
Back down again after adding a second, orange light on the background.
Take orange background light off the stand, and aim it hand-held at the front rims

And there you have it.  the dulling spray I applied to the black mirror was streaked simply by pulling a cotton cloth through it. Combined with the non-spoked wheels it gives the illusion that the bike is screaming down the path.

At least, it does to me!

Hope you enjoyed...

Oh Snap! Up In Smoke

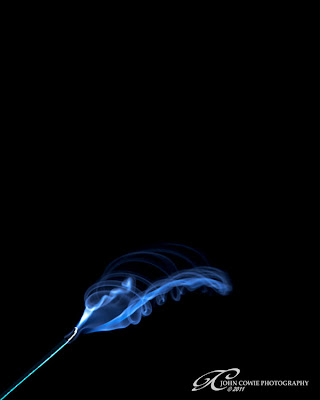
Sooner or later just about every photographer is going to haul out the incense or favorite cigar and shoot some smoke. After all these years, I finally succumbed...

Here's my first attempts: A couple images I inverted, and I like both - leave me a comment and let me know which ones you like the most...


Incense just getting started
Smokin' Tree

My Cup Runneth Over

Cup in White

Cradling the Smoke

Cradle in White

Tower

Smoking Pipe

Tumblin' Down

For those interested in the behind-the-scenes information, I have a little callenge for you: Only a couple of the two-tone images are presented as shot in the camera. No artificial work was done in post processing to create them. Which ones are they, and how'd I do it???

Hope you enjoy...

Oh Snap! My Car Collection

For some time now, I've been thinking about some interesting ways to shoot my cars.  Here's my first attempt.

If you're not into cars, you might still like these - 2 Ferrari's and a Fiat...

My first Ferrari


HA!  Gotcha, didn't I?!

Gull Wing-like doors are hydraulic - Dude, really!

My 2nd Ferrari

And, of course, for a fast getaway on the weekend, my Fiat!

See, even you can afford a Ferrari - well, maybe if you can find them on EBay. For a few years, Lego did limited runs (each model was only made for one year) on these large scale kits. I missed the first one (a generic formula race car), but started collecting when I saw their first generic convertible (not pictured). It could be built in 3 different ways. The next one out was the Ferrari (first one pictured above), and it only had one look you could create. Same for the next 2.

The year following the Fiat's production run (shown above) they came out with a large scale Humvee.  I passed cause it wasn't a car. If I'd known what I know now, I would have bought it - it was the last of the large scale kits.  (sigh)

All these cars have functional suspensions, steering and operating engine. Roll the car forward and watch the pistons in the engine pump up and down and the fan move.  The Fiat's suspension is fully functional, complete with shock absorbers. This is some cool tech here boy!!

Hope you enjoy...